Showing posts with label dinner. Show all posts

Oct 3, 2011

almost vegan pizza

What could be better than starting off Vegetarian Awareness month with a meat-free pizza party?! Pizza is one of those wonderful, easy, versatile meals that I can never get sick of. Seriously, you could put anything on a pizza and it would be delicious.

Last week, me and the roommate opened opened some wine, watched Project Runway, and made ourselves some fantastic homemade pizzas!

Stuff you need: 1. Pre-made pizza crusts- we like the ones from Whole Foods- you get 2 per pack 2. Any toppings your heart desires!

Once again, anything on a pizza will taste amazing. Here were our concoctions:
Molly's Pizza!
Side 1: Brie, chopped garlic, carmelized onions, & arugula
Side 2: Tomato sauce, broccoli, zucchini, green bell pepper, & mozzarella cheese

My pizza!
Side 1: Tomato Sauce, zucchini, red bell pepper, yellow bell pepper, & onion
Side 2: Tomato sauce, tomato slices, fresh basil, & almond cheese

While Molly's pizza was very cheesy, I decided to go with an almost vegan version. My favorite non-cheese cheese is the almond or rice cheese made by Lisanatti Foods. I completely fell in love with it a few years ago, while looking for vegan options to my favorite foods. The texture is impeccable- melts alright, and can be shredded- it's not slimy like a lot of soy cheeses, and best of all the flavor is great. UNFORTUNATELY, it's made with casein, so after all my searching, my favorite vegan cheese isn't vegan at all *sad trombone* If you're looking for a healthy alternative to cheese, I highly recommend this stuff. However, if you're morally opposed to any and all dairy products, this one isn't for you :(

Anyway, it was a delicious pizza party. Both versions were super tasty, and made plenty of food for our lunches the next few days. For next time, Molly recommends getting good quality brie (instead of the cheap-o stuff) so it melts better, and I recommend sautéing the veggies before applying them to the crust, for more flavor, and delicious pizza cohesion. Great night. Great food.

ALSO! Don't forget to check out VeganMoFo when you get the chance! I was too nervous to join in this year, but they're only 3 days in, and there's already TONS of amazing looking dishes! Maybe next year I'll grow a pair and join in the fun :)

Sep 12, 2011

breaded eggplant

You know what I love? Food gifts. There's almost nothing better than free, delicious things, and recently, I've been quite lucky in receiving tons of edible presents! I got a beautiful eggplant from my boss, Connie, and a truck load of fresh produce and a dozen happy chicken eggs from my parents.

After reading so much about the factory farming atrocities in Eating Animals, I'm having a very hard time eating eggs, unless I know where they come from. My parents happen to know a man in their area raising chickens in proper, humane conditions, and I couldn't be happier about supporting this local farmer, who really cares :)
Anyway, I digress. With all the wonderful, fresh organic food in my house, the first vegetable I had to devour was the eggplant. What can I say? It's my fave. I based my recipe off this one for Vegan Crispy Baked Eggplant from Chez Bettay. Mine definitely didn't come out as beautiful as hers, but for my first try at breading anything, I think it turned out pretty good.

I mostly stuck to the recipe, except I didn't peel my eggplant, used Panko for the bread crumbs, and used a regular oven sans pizza stone, since I don't own one. I baked my eggplant for about 15 minutes on one side, flipped it, and then popped it back in the oven for another 10. When the bread-crumb coating was starting to look golden, I slathered it with warmed pasta sauce, and devoured it with a side of sauteed beet greens.
The soft eggplant was a nice compliment to the crunchy crust, although I definitely should have baked it longer to give the bread-crumbs some serious bite. Also, 1 eggplant made plenty of food for my dinner, and I used the rest to make phenomenal sandwiches the next few days. Baked eggplant + pasta sauce + lettuce & fresh basil on whole wheat toast = to die for.

It was a good first attempt, and I hope the next batch is even better!

Sep 8, 2011

veggie pot pie

I think I've eaten one singular pot pie in my entire 24 years of life. My parents never made them, I never order them while out, and I've never had the thought to make one myself, until tonight! For some reason I got a mad pot pie craving while sitting in the office today, and instead of being productive and going to the gym, I promptly came home and fulfilled my pot pie desires. I loosely based the recipe off this one from Betty Crocker, but used what I had in the cupboards, and completely vegatized it!

Stuff you need: 1. Any veggies for the inside 2. 1/2 cup Bisquick Heart Smart mix 3. 1 egg white or egg replacer 4. 1/4 cup milk or milk substitute

Start by preheating your oven to 400 degrees while you get everything else ready. For the vegetable filling, I found in my kitchen 2 carrots, 1 zucchini, 2 tomatoes, 1 cup mushrooms, and a handful of frozen corn. Sauté the veggies in a little olive oil just until they begin to soften. Sprinkle the mixture with a little salt, Italian seasoning, and anything else you think might be nice.

Meanwhile, combine the Biquick, egg white, and milk in a bowl, and whisk all the ingredients together. When the oven is preheated and the vegetables are slightly tender, place the veggies into a small casserole dish that you've lightly greased. Now pour the Bisquick mixture on top of the vegetables, and make sure everything is nicely distributed and coated in batter. Look good? Great! Pop it in the oven for 20 ish minutes, and then dig into that tasty little pot pie.
For the second pot pie of my entire life, I'm pretty pumped! The hot, juicy filling is so nice with the warm, fluffy pastry top. I skipped the soup from the original recipe, so it definitely wasn't creamy, but the tomatoes gave off juice, so the filling was still plenty moist. My only thought for next time is more spices and longer cooking time! I was so excited for my dinner and a new episode of Project Runway, that I pulled the dish out of the oven before the top was super golden. Otherwise, it was a damn tasty meal, and one that came together surprisingly quick and easy. It may have been my second pot pie, but it most certainly won't be my last :)

Sep 5, 2011

roasted root veggie salad

I hope everyone enjoyed their Labor Day holiday weekend. Mine included Fright Night with the boyfriend, brunch with the parents, a couple of birthday BBQs, fighting crowds at the Taste of Colorado, building lots of Target furniture for the new place, and watching True Blood with the usual suspects, Jenna and Michael.

After a full day of grazing on various snacks at the the Taste of Colorado, a light, healthy meal sounded absolutely wonderful. Nothing makes you feel better than a giant, fresh salad, loaded with all kinds of good stuff, so that's precisely what we made last night- big ol' roasted root vegetable salads.

Stuff you need: 1. Lettuce 2. A protein of some type 3. Veggies for roasting- we found parsnips, golden beets, sweet potatoes, red onions, and asparagus 4. Your favorite salad dressing

Start by cutting up all your vegetables into big chunks, while your oven preheats to 400 degrees. Feel free to peel everything if you'd like, but we left the skins on since we didn't have a peeler. You may also want to enlist a few friends for all the chopping, since this is the most tedious part.

When everything is nicely cubed, place the veggies in a large bowl, and toss them with some olive oil, chopped garlic, salt and pepper. You may need to use 2 bowls, or do them in batches if you have a lot like we did. When everything is completely coated, place the mixture into a baking dish (or a few of them) and pop them in the oven for about 30 minutes.
Take the baking dishes out of the oven, give the veggies a good stir and another dose of salt, and put them back in the oven for another 30 minutes, or until everything is perfectly tender, just the way you like it.

While you're waiting on the roasting, watch some True Blood, drink some wine, and prepare anything else you need to- dressing, lettuce, protein etc. For the leafy base, we tore up romaine lettuce, and the greens that came attached to the beets. The beet greens were a little bitter, but a nice compliment to the rest of the salad. Jenna and Michael made fish for their protein portion, and I tried out some chick'n from Gardein, which, I must say, was pretty tasty.

Finally, after waiting so long and patiently, pull those hot, steamy vegetables out of the oven, throw everything together with a little salad dressing, and thoroughly enjoy one giant, healthy, totally loaded salad.
It was just what we were all craving. The leafy greens, and the warm tender vegetables were the perfect combination for a light, healthy salad, that still had some real filling power. Ever eat a salad and still feel hungry? Yeah, not with this baby. Also, all the veggies we used- 1 bundle asparagus, 1 parsnip, 1 red onion, 1 sweet potato & 2 golden beets- made SO much food, there were plenty of leftovers for my dinner tonight. As fall approaches and the months get colder, I will definitely be roasting some more vegetables for my devouring pleasure :)

Aug 28, 2011

southwest veggie bake

Last week was crazy for me. Between multiple grandparent birthday dinners, 10 hour work days, and a few kickboxing classes, I barely had time to breathe, let alone cook! Luckily, with some quick, simple recipes, and some planning ahead, I survived the chaos! One such recipe I made, was inspired by this summer vegetable tian over at Budget Bytes. The reds, greens, and yellows of the tomatoes and squash, were totally eye-catching, and I knew in a moment that I had to make my own version.

Stuff you need: 1. Yellow squash 2. Zucchini squash 3. Tomatoes 4. Black beans 5.Sharp cheddar cheese 6. Your favorite salsa

Start by preheating your oven to 350 degrees while you get everything else prepped. Slice your squashes into rounds, and your tomatoes into chunks that are roughly the same size. When everything is chopped up, arrange all the slices in a greased baking dish, until it's completely full. Give it a good sprinkle of salt and pepper, and maybe a little cumin too for good measure.
Next, combine 1/2 cup black beans, 1 heaping cup sharp cheddar cheese, and 1/4 cup salsa in a bowl, and stir everything together, until it's mixed well. Spread this mixture on top of your veggies, and then cover the dish with its corresponding lid or some foil.
Pop the dish into the oven for about 30 minutes, or until the the vegetables are tender, and the cheese is melted and bubbly. Now grab those hot pads and retrieve your meal! I gobbled mine down with a little more salsa on the side, but it was pretty tasty on its own as well.
The colors of the summer vegetables are so pretty, and the meal came together incredibly quick. It's a great dish for a busy week, because I managed to do laundry and other chores, while I waited for it to bake. I also liked the addition of black beans and salsa, which gave it a little protein, and a gooier texture. Next time, onions, potatoes, and more spices would all be excellent additions. It was the perfect dish for a busy week, and it made enough for lunch the next day too- bonus! :)

Aug 21, 2011

spinach stuffed shells

One of my favorite things in the world is making dinner with friends. There's nothing like getting together on a beautiful evening to drink wine, gossip, and create something simply delicious as a group. I honestly think the meal tastes better when the effort is shared through hard work, and lots of laughter. Tonight happened to be one of those evenings when Michael, Jenna, and I got together to watch the newest episode of True Blood, and make spinach stuffed shells over a few bottles of cheap white wine. Nothing could possibly make me happier :)

Here's Michael & Jenna slaving away over my stuffed shells. You can tell they're good cooks 'cause of the pouffy hats and curly mustaches.
Stuff you need: 1. Pasta shells 2. Ricotta cheese- 1 15 oz tub 3. Parmesan cheese 4. Fresh spinach 5. Fresh basil 6. 2 jars red pasta sauce of your choice 7. Garlic

First and foremost, put a large pot of water on the stove to boil, preheat your oven to 350 degrees, and crack open that first bottle of wine- making stuffed shells is a slightly long and tedious task, but trust me, it's totally worth it in the end. When the water comes to a rolling boil, throw in your shells with some salt, and cook them until they're al dente.

While you're waiting for your noodles to soften, sauté the spinach and diced garlic in a little bit of olive oil, until the leaves are nice and wilted. Combine the spinach, ricotta, parmesan, and chopped basil in a bowl, and mix it all up with some fresh ground black pepper. We kept things simple with spinach and cheese, but other veggies or faux sausage might also be a nice addition to the stuffing mixture as well.

When the noodles are softened, drain them, and rinse them under cold water. Be warned. If you skip the cold water step, you will burn your hands off. TRUE STORY.

Take the shells, stuff them with the cheese mixture, and place them into a baking dish that has a layer of the pasta sauce on the bottom. Keep filling up the shells until you're out of supplies, and then cover the whole dish with another layer of pasta sauce. Pop the pan into the oven for around 20-30 minutes, or until it's warmed through and bubbly. Pull out the pasta, give it a good sprinkle of parmesan, and put it back into the oven for a final 5 minutes. When you can stand it no longer, serve up those shells and dig in!
Oh my, look how delicious those little cheese pockets look before and after getting baked into gooey deliciousness. For time management and calorie intake, it's definitely not a meal I would make all the time, but if you'd like to show off a bit, or celebrate a special occasion, this is just the dish! And let's be honest, anything cooked in mass amounts of pasta sauce and cheese has to be outrageously delicious, right? RIGHT.

Great food, great True Blood, great friends, great night.♥

Aug 18, 2011

roasted green chiles 2 ways

You know what I love? Summer produce. Everything is beautiful, in season, and delicious. When I went to the grocery store last night, I was excited to see that green chiles were cheap, so I scooped up a handful of Anaheims, and began to hunt for tasty recipes. After browsing all the great ideas on Central Market, I decided to make my own version of the black bean stuffed bell pepper, and then add a chili cheddar biscuit on the side.

First and foremost. Stop everything you're doing, and roast your peppers! I didn't know this was necessary, but a chat with my mom confirmed that roasting your chiles is the best way to go. Simply plop your peppers onto a baking sheet and let them cook under the broiler approximately 5-10 minutes or until they're brown and blistering. Make sure you flip the chiles half way through to get both sides cooked, and when they're looking browned to perfection, take them out, peel off the skin, and use them up!
You can immediately use them in your recipes, or seal them in a plastic bag for future use. Tonight I did a little bit of both-I used 2 for my dinner, and stored the rest for stew, or burritos, or something else amazing.

For the quick-fix chili cheddar biscuits you need: 1. Bisquick Heart Smart mix 2. Milk- I used rice milk 3. Cheddar cheese 4. Roasted green chiles

I know using Bisquick is like, half cheating, but when you work all day, and want something delicious and fast, then shortcuts are often the answer. Besides. The Box said Heart Smart, so it can't be all bad, can it? :)

Follow the directions on the back of the Bisquick box stirring together the dry mix with your milk product. Add a healthy 1/2 cup of sharp cheddar cheese, 1 diced, roasted green chili, and pop those babies in the oven. 9 minutes later you will have yourself 5 soft, moist, cheesy biscuits, with just a slight hint of heat. They were absolutely to die for, but note for next time: more cheese & more chiles. Yummm
For the stuffed bell pepper you need: 1. 1 Bell pepper- I used red 2. Cous cous 3. 1/2 cup black beans 4. Cheddar cheese 5. Your favorite salsa 6. 1/4 diced onion 7. 1 roasted green chili diced

Start off by preparing your cous cous. You can also use rice, or any other grain, but I used cous cous since I had it on hand, and it cooks very quickly. While your grain is cooking, cut off the top of your bell pepper and scoop out anything that's inside. Now chop up your onion and green chili, measure out your cheese, black beans, and salsa, and when the cous cous is ready, mix everything together in a bowl and stuff it inside of your hollowed out bell pepper. You will definitely have lots of extra filling, but you can serve it as a side, or snack on it while your pepper is cooking.

Place the stuffed bell pepper into a baking dish with about 1/4 inch of water in the bottom, and put it into a 450 degree oven for about 30 minutes. The recipe I based mine off of said 30 minutes in a 350 degree oven, but just check on it occasionally, and when the pepper is soft and the stuffing is heated through, you're good to dig in!
Biscuits and stuffed peppers? A slightly strange combination, but both fantastic uses for my roasted green chili peppers. The slight hint of spicy heat in both recipes was perfection. I think my first time roasting peppers was incredibly successful, and now I can't wait to try my roasted green chiles in all sorts of new recipes! Yayy!

Jul 26, 2011

bbq tempeh & kale

O.M.G. I don't know if it's possible to accurately describe how full and incredibly content I am right now. I don't know if it was sheer genius, or dumb luck, but tonight's dinner was incredible. I'd like to make this introduction better, but let's skip it and get right to the food. BBQ tempeh and kale! *drool*

For the BBQ Tempeh
Stuff you need: 1. 1 block tempeh 2. 1 bell pepper 3. 1/2 onion 4. your favorite BBQ sauce

Start off by bringing approximately 3 cups of water to boil in a saucepan. When the water is boiling, put some salt, and the tempeh brick into the water, and let it simmer on medium for 20 minutes. While your tempeh is boiling, thinly slice your bell pepper and onion into strips and sauté them in in a little olive oil, until they're nice and tender. When the tempeh is done, drain it, and slice it into long thing strips, just like the onion and peppers. Combine the tempeh, veggies, and a healthy helping of BBQ sauce in the skillet or saucepan you already used, and let everything heat together.When you can stand it no longer, dish it up, and dig in!

For the Kale
Stuff you need: 1. 1 garlic clove 2. a bunch of kale 3. 1 can diced tomatoes 4. brown rice

For the kale dish, I was inspired by this recipe from Epicurious, but I altered it according to what I had on hand. I started by making a pot of rice- using leftover rice would be helpful, but it wasn't a problem to prepare everything else while the rice cooked. Meanwhile, mince the garlic, roughly chop the kale, and open and drain the can of diced tomatoes. Sautee the garlic in a little olive oil, and when it's just starting to turn golden, add the tomatoes, kale, and a good sprinkle of salt. Occasionally stir it every few minutes, and when the kale is tender, add the rice, toss everything together, and serve.
Holy shit that was a good meal. The tempeh is just like good ol' fashioned BBQ- a little sweet, and the texture is perfect. Substitute this into a Philly cheese-steak, and you'd never miss the meat! Also, the kale concoction was just the right side to serve with the tempeh. The slightly-sugary BBQ sauce was nicely complimented by the savory, tenderness of the tomatoes, rice, and kale. Omg I just can't say enough good things about this dinner. Tonight's meal = AMAZING!! :D

Jun 27, 2011

ass kickin tofu

I am definitely a spicy food connoisseur. Ever since I was a kid, my dad and I have have been pushing the heat boundaries with copious amounts of Sriracha and hot peppers, much to my mom's dismay. Tonight for dinner, I thought I'd try my hand at baked tofu with a little kick.

Stuff you need: 1. A block of firm (or extra firm) tofu 2. Chili garlic sauce 3. Soy sauce 4.Hoisin sauce 5. Olive oil

Start off by squeezing all the liquid out of the tofu- I like to wrap it in a paper towel and place a heavy object on top while I prepare everything else. While the tofu is indisposed, prepare your marinade. Combine approximately 2 tablespoons olive oil and soy sauce with 1 tablespoon hoisin. Give it a good stir and a taste, and adjust the flavors to your liking- some ginger, sesame oil, or lemon juice would all be nice additions.

When your marinade is ready, grab the tofu, slice it into slabs, and arrange it in a glass baking dish. Lightly coat each piece of tofu with the chili garlic sauce, and then pour the marinade on top. Now pop the dish into the fridge while you preheat the oven to 350 F. About 5-10 minutes in, flip the tofu over so both sides soak up all those great flavors. At this point, I lightly coated the other side of the tofu with more chili garlic sauce. Please feel free to skip this step, unless you like your food with some serious burn.

When the oven is ready to go, pop that spicy tofu in for 15 minutes, flip the slabs over, and cook for an additional 20. When it's looking golden all over, gather some kleenex, a glass of milk, and dig in!
Now that is some tofu that will kick your ass. I mean, real coughing-fit-makes-your-nose-run kind of spice! Yeow! Some steamed broccoli and orange cauliflower were a really nice compliment to this dish- the hot, heat of the tofu, and the mild, subtle veggies were a great combo. I ate half of the slabs tonight, and popped the rest in the fridge for some stir fry tomorrow.

I must say, that for completely making this up on the fly, I'm pretty pumped with the results. Next time, I'll definitely increase the oven temp so it's a little less soft, and a little more crunchy- I think 375 or 400 degrees would work great. Also, I think a longer marinading time would help enhance flavors, but let's be honest, I'm usually hungry and impatient after a long day at the office.

A hot, fiery meal, for a hot, summer day. It needs a little tweaking, but not bad for my first attempt at baked tofu :)

Jun 9, 2011

chipotle sausage cous cous bowl

Ever since I made those fantastic faux-rizo and Anaheim enchiladas a few weeks ago, I've had the rest of the Field Roast chipotle sausages sitting in my fridge. I kept thinking I'd save them for something special, but tonight they called to me, and I threw them together with some fresh produce for a cous cous bowl with a south-of-the-border zing.

Stuff you need: 1. Cous cous- or rice 2. Meatless chorizo 3. Fresh veggies 4. Salsa 5. Spices

Start off by placing a pot of water on the stove for the cous cous- this grain works best with a 1:1 ratio of water, so measure accordingly. When the water is boiling, throw in the cous cous, give it a stir, pull it off the heat, and put the lid on.

While the cous cous is sitting, chop up your chipotle sausage and fresh veggies into bite sized pieces- tonight I found spinach, tomato, and orange cauliflower- oh yes. Orange. Throw the cauliflower and sausage into a warmed skilled with a little olive oil, and sauté the mixture for about 5 minutes. Next, throw in the spinach and tomato, and season everything with your favorite flavors- salt, pepper, cumin, and hot sauce!

When your faux-rizo/veggie concoction is heated through and smelling amazing, fluff the cous cous with a fork, place it into a nice deep bowl, and then top it with your veggies and meat. Slather a little salsa on top, mix everything together, and dig in! A little spicy, super fresh, and pretty hearty- the perfect combination for my Thursday night meal.
I like the juxtaposition between the light, fluffy cous cous, and the thick, chunky sausage- it's a hearty meal, that still feels like it's on the lighter side. I also love the little kick from the Field Roast chorizo, and the bright colors of the spinach and cauliflower. Tonight was definitely a "throw-everything-you-can-find-into-a-skillet" kind of night, but the outcome was successful. I even whipped up a vegan BLT wrap for tomorrow's lunch! What a tasty, productive evening :)

Jun 2, 2011

chorizo & sweet potato enchiladas

A few weeks ago, I was lurking over at Budget Bytes- one of my favorite blog haunts- and I came across the recipe for chorizo and sweet potato enchiladas. My initial thought was, all that crap? In enchiladas? No way. I think I've gotten too comfortable in my cheese and black bean enchilada rut. I sat on this thought for a week or so, and finally decided to be bold, and to try out this dish on a couple friends for dinner last night.

I stuck to the recipe pretty closely, except I used regular sized whole wheat tortillas for jumbo enchiladas, substituted Old El Paso sauce for Las Palmas, used Anaheim peppers since the store was out of Poblanos, and finally, used vegetarian chorizo instead of the meaty kind! That's right. Those chorizo enchiladas got vegatized!
So I chopped and sauteed everything according to direction, and pulled out a casserole dish. Budget Bytes says to coat the pan with non-stick cooking spray, but if you cover the bottom of the dish with a little enchilada sauce, it works just fine. I rolled the enchiladas, popped them in the oven, and 25 minutes later, I was rewarded with an outrageously delicious meal.
Oh my, doesn't that look amazing? Trust me, they taste even better than they look! I told myself I would only eat 1, but that didn't happen- I ate a few :) The sweet potatoes give this dish a great chewy bite, and the Anaheims + faux chorizo give it just the perfect amount of spiciness! All three of my carnivorous friends said they were damn good too! This is a dish I will definitely make again. And again. And again.

Oh! And if you're looking for a meat-free chorizo, I used Field Roast's Mexican Chipotle Sausage, and I highly recommend it! The texture is dead on - it even comes in a casing- and the flavor is great. Moral of the story is that the vegatized version of the sweet potato and chorizo enchiladas were a huge hit, and I can't wait to make them again! Yum!

May 14, 2011

tostada pizzas

This is the first time in my life that I've ever lived on my own, and grocery shopping for one is definitely interesting. I'm finding out that food sticks around a lot longer when it's just me, which means when I make a big pot of soup, I eat soup for 12 straight meals. Hm. I need to 1. learn to utilize the freezer and 2. get more creative with my leftovers and large quantity ingredients.

This is the situation I have found myself in with pasta sauce. I have some Newman's Own hanging out in my fridge, and a person can eat only so much pasta. Thus! Tostada pizzas.

Stuff you need: 1. Corn tortillas 2. Pasta sauce 3. Cheese 4. Toppings 5. Italian Seasoning 6. Olive oil

Turn your oven to broil, and while it's warming up, fry up your corn tortillas in a skillet with a splash of olive oil so they're a little crispy. Slice up your toppings, and shred your cheese, and when everything is ready, assemble your wee pizzas. Top the tortillas with sauce, then shredded cheese (I had monterey jack), then your veggie toppings (I used tomatoes), then more cheese (I used parmesan), and finally some Italian seasoning sprinkled over the whole deal.

Pop it under the broiler for 5-10 minutes until the cheese is melty and devour!

I think the corn tortilla was a really nice flavor for the pizza, and it was perfectly crispy and easy to just pop in your mouth! It also came together super fast and totally hit the spot for my gin hangover. Double score.

I will definitely be thinking more creatively towards my ingredients. In fact, Food Network has 50 fun ideas for your pasta sauce. I personally like it over polenta, over steamed broccoli and white beans, and now on creative pizzas too! Lotsa pasta sauce? No problem :)

May 10, 2011

boca beef tacos

I've said it before, and I'll say it again: you can put just about anything into a taco, and it will be delicious. Last time, I think I used Boca chik'n patties with a hodge podge of random things I found in the kitchen. Tonight, however, I went over to Michael's house, where we vegatized the classic beef taco!

If you haven't discovered Boca ground crumbles yet, go to the store and purchase them right now! They're a meatless version of ground beef, but way better. I usually use them in marinara sauce over pasta, but tonight, we mixed it up and used it in tacos.

Stuff you need: 1. Boca ground crumbles 2. a taco seasoning packet or your spices of choice 3. corn tortillas 4. taco extras- salsa, avocado, onion, lettuce, tomatoes, beans, cheese, etc.

Start by browning/warming your Boca crumbles in a skillet with a little olive oil. When they're totally defrosted and warmed through, plop in your taco seasoning packet according to the directions on the side- there are tons of different brands, but ours was mixed with 2/3 cups water, added to the "beef" and then simmered for a few minutes.

When the meatless meat mixture is all gooey and ready to go, chop up your taco extras. Tonight we had 505 salsa, a little bit of shredded cheese, black beans, avocado chunks, and red onion. Nuke the tortillas in the microwave for a hot second, and then fill to the brim with everything!
It looks like a legit beef taco, right? The seasoning packet was a great idea. The mixture may have been a little salty since we only used half of the crumbles- the entire bag would have distributed the flavors better- but otherwise, a tasty meal! This is definitely one of those dishes that hardcore carnivores would happily devour with no complaints. Another delicious use for Boca crumbles is a success! :)

May 4, 2011

almost instant faux pho

The first time I had pho, it totally knocked my socks off. The flavors are so rich and fresh, it's seriously healthy, and I love adding sauces to make the dish taste just how you like. Unfortunately after becoming vegetarian, I quickly found out that the flavorful pho broth is made with a crap ton of animal parts. Boo. I hear that there are a few places that do veggie pho, but I have yet to hunt those locations down. So craving pho, and being short on time, I threw together my first attempt at homemade faux pho.

Stuff you need: 1. Veggie broth 2. Rice noodles of some kind- I used stick noodles 3. Various sauces- hoisin, soy, and chili garlic were perfect for this dish 4. Veggies- I used bean sprouts, bell pepper, cucumber & green onion 5. 1/2 lime

Start by bringing your vegetable broth to boil in a pot- just enough to cook the noodles in- kind of like pasta. When the broth is boiling, remove the pot from the heat, and throw your noodles in for 8-10 minutes, or until al dente.

While you're waiting for your noodles to get tender, chop up all the rest of your ingredients. I cut the bell pepper into julienne strips, the cucumber into sliced quarters, and the green onion into little chunks- just bite sized pieces that you can easily slurp up.

When the noodles are ready and the veggies are prepped, take a bowl and fill it with noodles and a big ladle full of the broth. On top of this, toss all your chopped vegetables and bean sprouts, and then season with the sauces of your choice- hoisin is especially great, and the chili garlic gives it a nice kick. Finally, squeeze the lime half on top of everything, and devour. Really, that's it!

For being such an impromptu meal, I was really surprised that the flavors were so great. If you don't like how it's tasting, it's so easy to add a little more of this and that until it's just right. The only thing I think my faux pho lacked was basil- which it's traditionally served with. Next time, I will make sure to use basil as well, but honestly, I think it was pretty damn delicious as is. Quick, filling, healthy, and spectacular. I will definitely be making this one more often :)

Apr 30, 2011

yard house

You know what I love? Being pleasantly surpsied by vegetarian options in a seemingly un-veg-friendly place. Last night the boyfriend and I grabbed a late dinner at Yard House. The first time we went there, I was pretty hesitant, because at a first glance, it looks like the kind of place that only has meat meat meat! The menu boasts tons of beers, ribs, and about a dozen giant loaded burgers. Oye.

However, our friendly waiter (who was actually vegetarian too) convinced me to try their meat substitute, and guess what. It's phenomenal! The first time we went, I got the orange "chicken" and last night, and I got the "chicken" strips. Look at it! You'd never guess that's veg-friendly! Even my carnivorous boyfriend had a few bites and said it was pretty good :)
The texture is dead on and it's crispy fried to perfection just like a real chicken strip. The chicken flavor isn't quite there (so says Troy) but being a vegetarian, I don't want to be eating chicken, so I think the flavor is great to boot.

Second time at Yard House, and my second time being seriously happy with my dinner selections. Not just this, but they have an entire section of their menu devoted to this awesome gardein meat substitute, so there's lots of vegetarian options hidden amongst their ribs, burgers, and real meat items. Yard House? Highly recommend.

Apr 18, 2011

tempeh & sweet potato tacos

I hate tempeh. One time in college, I bought some, trying to be all healthy and creative, and it was hands down one of the grossest things I've ever made. I tried to heat it in a skillet with some olive oil and then eat it like a piece of toast and omg. Top 5 most epic kitchen fails of all time right there.

To my surprise, however, I have had a change of heart thanks to my friend Stephanie. Stephanie is my guru for all things healthy, fit, and amazing. She cooks, she runs, she thrifts, she's awesome. Last week we got together with some friends and she talked me into a second try with tempeh. Guess what. I'm sold.

Stuff you need: 1. Tempeh 2. A few sweet potatoes 3. Corn tortillas 4. 1 can black beans 5. 1 can corn 6. Other taco accoutrement- salsa, lettuce, cheese, avocado- whatever suits your fancy

Start by shredding your sweet potatoes in a food processor or by other means of your choice. Meanwhile, open up your box of tempeh and crumble it into a skillet with some butter. Maybe you could omit the butter, but maybe that's what it was so tasty? :) When the potatoes are shredded and the tempeh is heated through, set them aside in a dish while you prep everything else.

Combine the beans and corn in a saucepan, and warm them up while you chop up your lettuce, avocado, cheese, tomato, and anything else you've decided to throw into your tacos.

When all your filling ingredients are ready, throw the tempeh and sweet potatoes back into the skillet with some salt, pepper, maybe cumin, and warm the mixture through. Now zap your corn tortillas in the microwave for a hot minute, and assemble your dish!
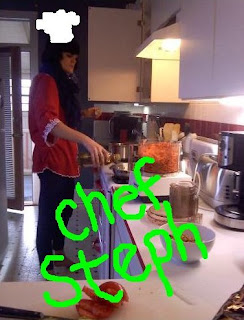
The most time consuming part is all the prep work, but once you're done, the taco assembly takes only seconds. Take a gander at chef Stephanie convincing me that tempeh actually tastes good. Impressive.
This tempeh attempt was far better than my first. In fact, I bought a package of my own! The flavors are really great, and the addition of tempeh to the tacos is that extra boost of protein that I think my diet has been recently lacking. It would also be great in a tofu scramble or on a salad! Moral of the story, is that I'm pretty excited about my newfound like for tempeh, and I'm ready to try some new recipes on my own. Thanks Stephanie! ♥

Apr 13, 2011

sesame asparagus & mushrooms

When I say sesame tonight, I don't mean the usual sesame sauce you find in restaurants- I mean sesame oil. This is one of my parents' favorite recipes, and a wonderful, simple dish that I've grown up eating, and loving. If asparagus is in season, definitely use it, cause it makes the flavor so much better!

Stuff you need: 1. a bunch of asparagus 2. a bunch of mushrooms 3. sesame oil 4. soy sauce 5. rice and/or sesame seeds (both optional)

Start by chopping up your mushrooms and asparagus- making sure to snap off the nasty ends of the asparagus before you start. Stir fry tip: prep all your ingredients before you start cooking- veggies chopped, spices measured, etc. Stir frying is such a quick method, so having everything ready to go will help make the meal faster and easier.

When your prep work is done, heat a little sesame oil in the wok over medium heat. When the wok is warmed, throw in the asparagus and cook for a few minutes. Next, add in your mushrooms and cook for a few minutes longer. When your vegetables are to your preferred tenderness, add more sesame oil and a little soy sauce, and call it a night. Feel free to add more spices to your liking, but the simple flavors of this dish are what make it so great.

When your veggies are ready, toss some sesame seeds on top, and serve the concoction over rice, or noodles, or just by itself since it tastes so good!
It's a quick meal with fantastic flavors. When it's asparagus season, nothing beats this recipe. It's been a staple at my parents' home, and now it's becoming a staple at mine :)

Apr 11, 2011

zucchini pizza boats

Let me start by saying that I'm a total blog stalker. I lurk on tons of blogs, ogle the photos, get all excited about the new posts, but never comment. I know. I'm a creep. One of my favorite haunts is a blog called Budget Bytes. All of the recipes are cost effective, look great, and many of them are vegetarian friendly too!

Last week, I spied this gem of a recipe and had to try it out myself- zucchini pizza boats? Yes please! Her pictures are much prettier, but I still think my zucchini boat looks gooey and amazing!
My one complaint, is that I wish it was more flavorful- however, I 'spose that was my bad :) Instead of following the recipe's measurements, I threw a little of this and that into the zucchini/sauce mixture. Next time, I'll make sure to pay closer attention to the specifications, and add more than just a dash of Italian seasoning, garlic salt, and parmesan cheese. Still! A great, easy recipe, that was apparently only $1.32 per serving. I love it! I will definitely continue to try Budget Bytes recipes in the future!

While I'm on the topic, here is a surprising article about vegan foods- peanuts? Yikes! Also, I'm inappropriately excited about these butterbeer cupcakes (omg Harry Potter July 15), and every single one of these sandwiches. Next time I'm hungover, I'll probably attempt that cheesy mac and rib *drooool* Of course, there are many more delightful things that I'm stalking, but that will have to wait for another time. I have another pizza boat to devour!

Apr 6, 2011

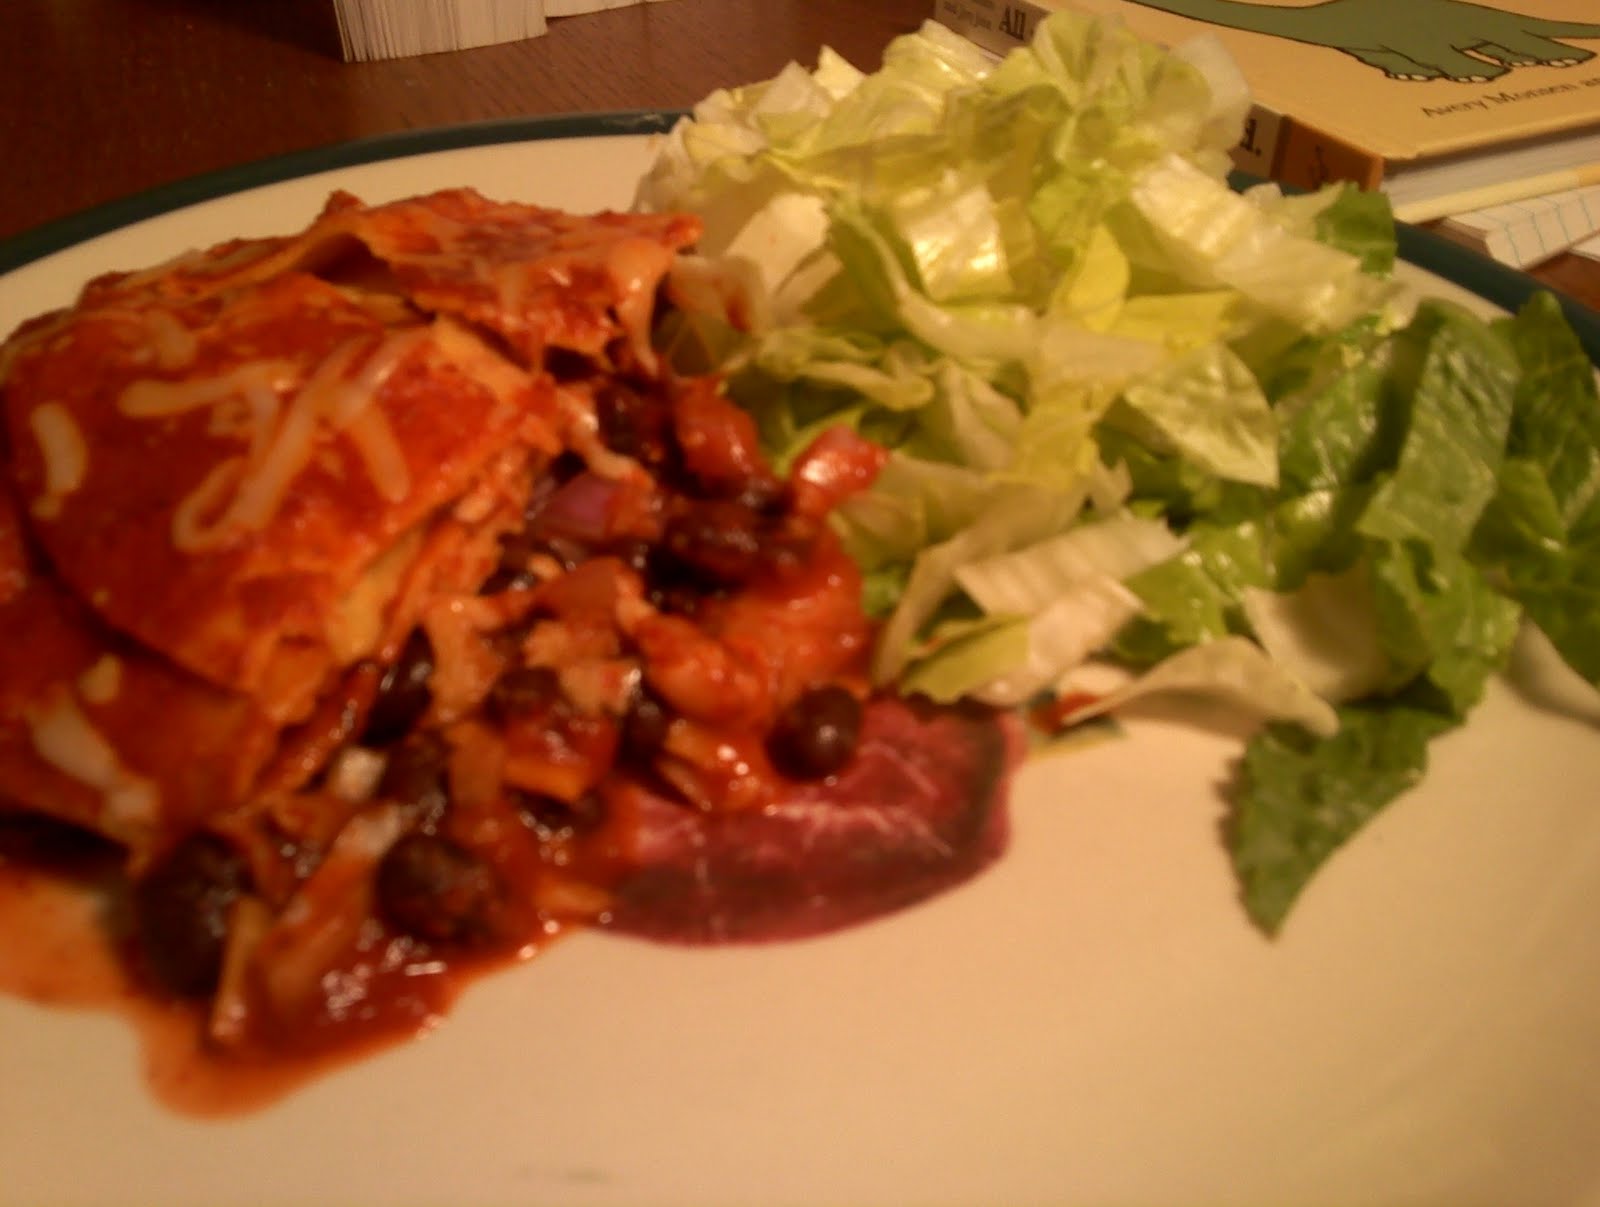
enchilada lasagna

I've been meaning to try this recipe out for a while now, but life keeps taking me out to dinner or requesting a movie night with friends, so finally, after much ado, I had a chance to try out my ingenious enchilada lasagna. I've seen tons recipes for enchilada casserole, and I love the concept. So, tonight I winged this one, and made up my very own version.

Stuff you need: Corn tortillas- although, I 'spose wheat would work too 2. 1 can enchilada sauce 3. 1 onion 4. 1 can black beans 5. cheese of some sort (optional) 6. Your fave spices

Start by preheating your oven to around 350. My ghetto oven doesn't have an "I'm preheated alarm", so I turn on the oven while I prep, and then throw everything in and hope for the best. While the oven is preheating, open and drain your can of beans. Chop up your onion, and add that and the beans to a good sized bowl for mixing. Add your favorite spices (I like garlic salt and cumin) and mix everything together.

Pull out a small baking dish, and pour a little enchilada sauce in the bottom of the pan- just enough to cover the entire base. Then cut 2 tortillas in half so they fit flush against all 4 sides of the dish. You will put each half on one side of the pan, and then one whole tortilla goes in the middle. Thus, each layer of the casserole will use 3 tortillas total.

On top of the tortilla layer, put more enchilada sauce. Then top that with the bean/onion mixture, and cheese if you're using it- I only had a little cheese, but more cheese and tomatoes would have both been a fine addition :)

Keep layering your casserole in this fashion until the pan is full or you're out of ingredients. Sauce. Tortillas. Sauce. Filler. Sauce. Tortillas. Sauce... etc. etc. etc.

Finally, throw everything in the oven for about 15-20 minutes, or until warmed through. Cut your portions, and serve it up with some chopped lettuce and your favorite salsa on the side.
For my first attempt, this was a total success. The flavors were great, and it was just what I had been hoping for. Next time, I think I'll definitely add more cheese, sauté my onions before assembly, add fresh tomatoes to the filler, and cook it with foil on top, instead of just bare. Try your own alterations to make this dish your own too! After a few more tweaks, this will definitely be a winning recipe :)